Tuesday, May 28, 2013

Painting the Entry (Accent Stripe)

I didn't want to go crazy with painting in the house. Didn't want to do typical accent walls or a million different colors throughout the house. So we chose a few colors and decided to paint the whole house in different ways with those few colors. Most of our rooms are just 1 of those colors, plain and simple. You've already seen the dining room (if not, check out this post), and here is the only other really interesting paint job I'm doing in the house. I went with a sort of classic feel but with chalkboard paint (at a good child's height), a fun aqua, and the fresh light grey that is throughout most of the house.

Jake and I figured out a width we wanted the stripe to be and the level on the wall it would be. He measured and I taped. I put the tape on the inside of the stripe so I could paint the bottom and top and leave the stripe for last. I painted the chalkboard paint, then the light grey and re-taped it so the tape was on the outside of the stripe. I just used a brush and lightly (so as to not glop around the tape line) painted the aqua on. I pulled off the tape while the paint was still wet.

I included a picture of what happens a lot of time because of gravity with the paint. It wasn't this bad in most areas, I just photographed the worst to show you what can happen. But those little drips were easily fixed with a little brush, some chalkboard paint, and a steady hand. =)

I LOVE how much our house is changing. It really is becoming OURS.


Tuesday, May 21, 2013

Chalkboard Cabinets

When we got our house, 2 of the cabinets in the kitchen just had the frame, and no panel in them. I assume they were going to eventually put glass in them, but in the end, they were glass-less and shelf-less. They are still shelf-less (it's on Jake's super long to-do list), but now they have panels. I'm not one to show off my dishes or anything, so getting glass for the doors wasn't really something I was thrilled about. Then I realized chalkboard would be perfect. I found chalkboard panels at Home Depot, had them cut the panels to size there, and fit them in without too much hassle. I used wood glue to set them in and then push points to stabilize the whole thing. Really simple project that is helpful in both hiding my things and to use as menu and grocery list boards! (Still have to purchase those awesome chalkboard markers....)

Before


After

Monday, May 20, 2013

Mid-Century Modern

I've been really drawn to the mid-century modern style for our living room. The clean lines just really do something for me. I wanted to make sure the dining room and living room have distinct styles, and by using cleaner lines in the living room and more ornate/intricate pieces in the dining room, I think that I am accomplishing that goal.

(Check out my living room board on Pinterest here.)

I have been trying to find most of our furnishings at thrift stores—not just to cut down on costs (because anyone who regularly goes thrifting knows that prices have been skyrocketing, so that can't be reason alone), but also to just reuse what has already been made. Keeping stuff out of landfills is really important to me, and I want to do my part in recycling, and this is one way to do it.

That being said, I'm not the only one drawn to mid-century modern furniture right now, and so it is difficult to find good pieces for good prices at thrift stores. So imagine my surprise when I walked into SOS Thrift Store on the corner of Rutherford and Wade Hampton and saw this little gem for $80! It is beautiful and I love it and I immediately claimed it with the cashier before looking around the rest of the store. The only issue with it is that someone replaced the top with particle board that doesn't match the beautiful wood on the rest of the piece, so Jake will be re-replacing that top sometime in the future.

But for now, it's a lovely piece that really helps out our living room.


So then my dad remembered that he had my great-grandma's coffee table in storage....which she bought in the 1950s. And yes, it fits in superbly. We were wanting a pretty large coffee table, so we may replace it in the future, but for now it's awesome and I like it a lot, and....it was free. Happy about how all this is coming together!

Sunday, May 19, 2013

First Before and After Room!!

Yay! We have officially FINISHED a room in the house. Not gonna lie, it's pretty incredible to me. Now, granted, it is the smallest room in the house. Actually about half the size of the master bedroom closet, but still. IT'S A FINISHED ROOM. And that makes me happy. Here are some pictures. The long poster came from the Salvation Army (see the original post) for $12.97, the other picture is a print/painting by my dear friend, Sarah Lourenco that I bought at her senior show for about $40, and the mirror is from Trunk Treasures for $8 (thanks, Mom, for picking it up for me!) which I spray painted black. I love the French-ish look of the whole thing. I had originally wanted to paint it light grey, but we had some dark left over, and I thought it would look awesome with the beautiful sink, and things just kind of fell together. I love this room and I hope you do too.

BEFORE:


 AFTER:


The 2 lovely ladies in the pictures (I just had to highlight them because I love them):


How to Paint a Curve on the Wall

Back when I was brainstorming about how I wanted to decorate my house, I came across a picture on Pinterest of a wall painted with 2 contrasting colors in a curve design. (See picture here.) I wanted to do something with chalkboard paint in the dining room, and figured it would be amazing if I could make this curve thing happen with the charcoal grey we were doing and the black chalkboard paint. I couldn't find a good tutorial online with how to do one, so I just used my brain, a bit of common sense, and some creativity to make this work.

It seemed easiest to use a string—made sense that a string connected to the top of the line and the end of the line, would curve in a normal manner. So after painting the first coat of dark grey, I taped the top of the string to the ceiling and had Jake hold the other end while I stepped back and had him situate it perfectly. Then I taped the middle to the window frame to keep it in place.


After that, I taped along the string. If you've ever sewed a sleeve onto a garment, you'll understand how I did the taping. I made sure the bottom of the tape was smooth (where I would be painting against) and the top wrinkled as I went along to accommodate for the curve. After the tape was in place, I removed the string.


 After the tape was in place, I painted the bottom half with the chalkboard paint. Once that was dry, I had to do the 2nd coat of grey on the top half. This time, I had to tape the other way which meant a different application of the tape since this time it was applied to the bottom of the curve. I used about 6 inch long pieces and curved them along the chalkboard paint. 


And, finished!! It turned out lovely, and I am thrilled with this one-of-a-kind addition to our dining room. Looking forward to showing you more paint changes in the house!
Also, I'd love some feedback from you all.....was this a good tutorial? Could I have been more clear in my instruction? I want to make this as helpful as possible. =) Happy painting!


Saturday, May 11, 2013

Treasures for the Home

More treasures for our home! I have an awesome buddy, Ashley, who is my partner in crime when it comes to yard-saling, thrifting, and antiquing. She can sniff out a deal better than anyone I know and on top of that, her taste is spot on. We used to be neighbors at our apartment complex, and then she bought a house 3 weeks sooner than we did. So we've had fun searching for treasures together since it's yard sale season, and since we have space to put our findings!

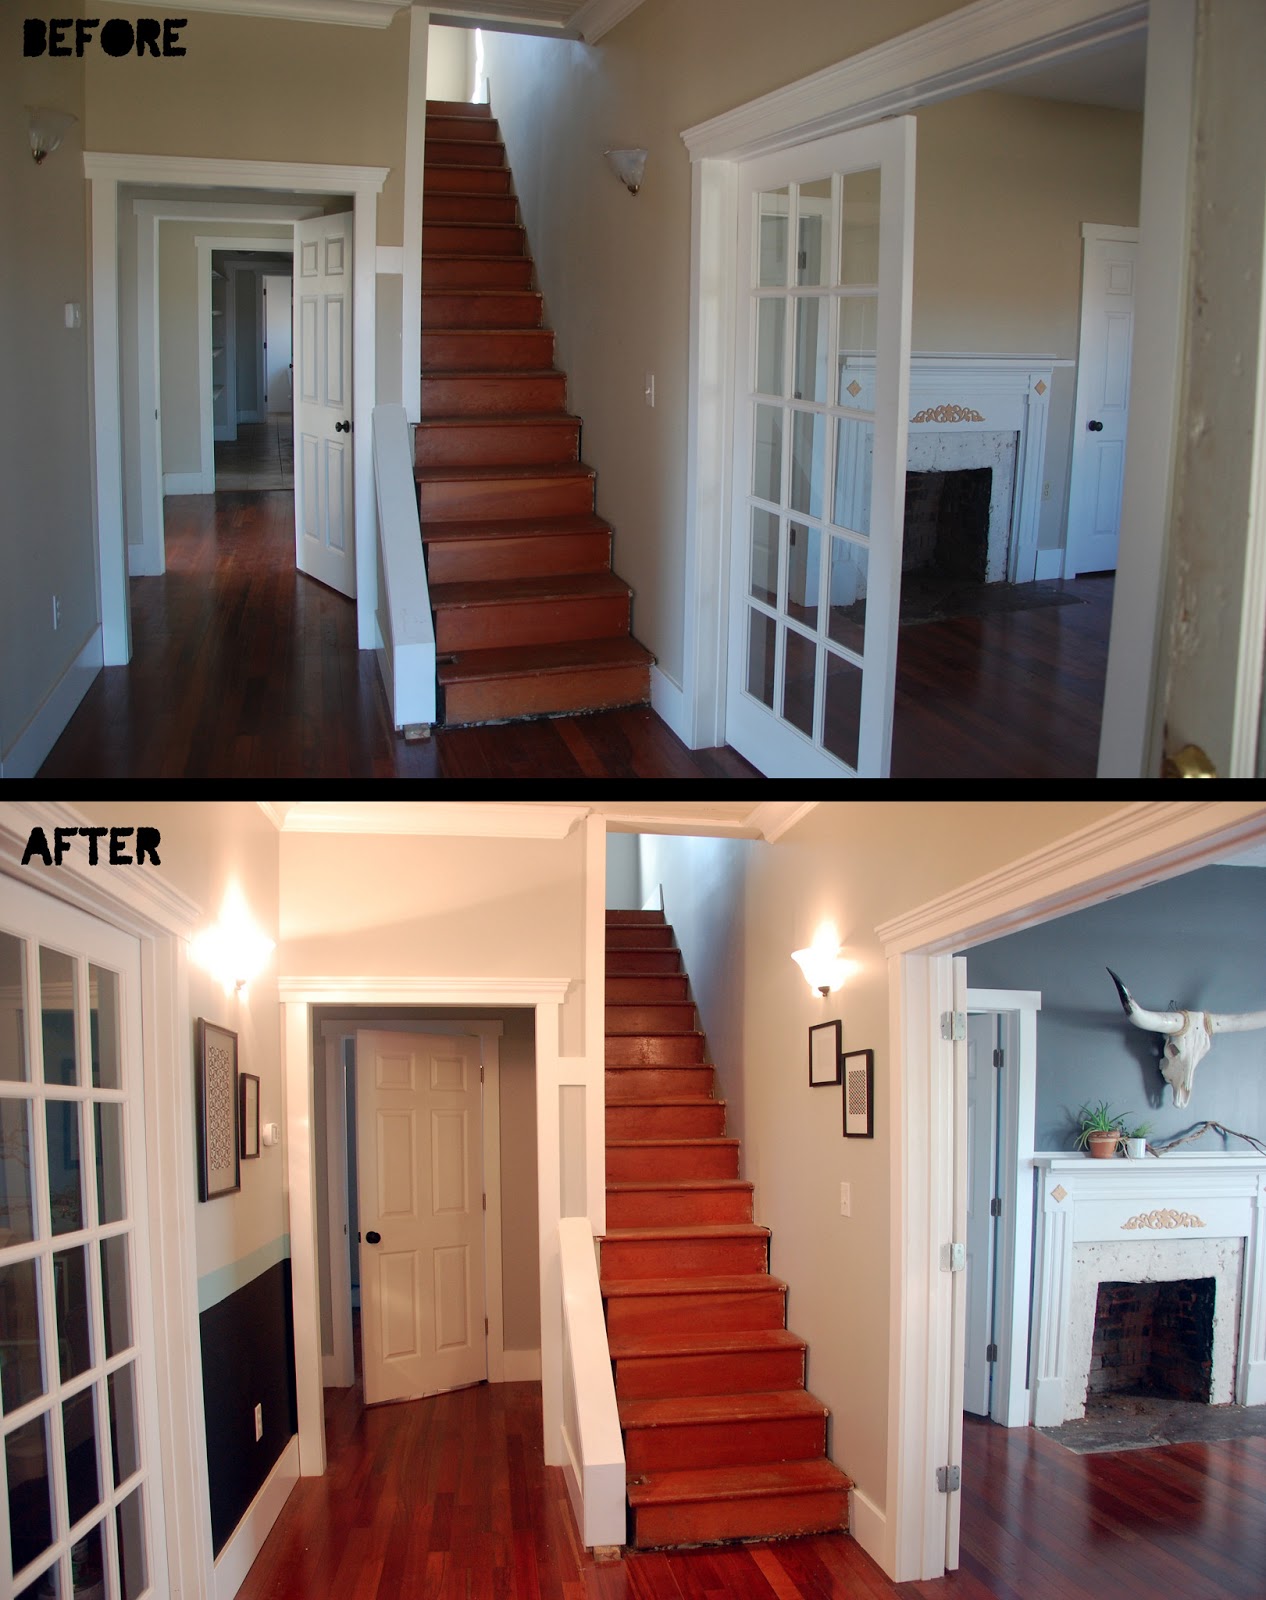
Well, last weekend we went to the Glassy Mountain Fire Dept. yard sale (got a tip from our friends Matt and Amy) and I found this beautiful set of chairs with the most whimsical fabric ever. They wanted $75 for each chair and I talked them down to $120 since i was buying both. That is a lot of money to put down, but these chairs were just too magical to pass up. I also picked up a little print that was signed by the artist and was print 3/11. Pretty sweet! Then we decided to make a day of it and headed up to Hendersonville since the Glassy Mountain Fire Dept. is halfway there anyway. In an antique store on Main Street (Village Green Antique Mall), I found my favorite treasure, which we dubbed "Henry". Henry is a longhorn skull with beautiful horns that is now proudly displayed above our dining room fireplace. I love him and he makes our dining room that much more awesome. Also in that antique store, I found a sweet little kitchen stool. I'd been looking for one for awhile, but I was being picky about it. It had to be solid and a good height and width. I'd found a few but they were anywhere from $35-$50!! So even though I wasn't planning on spending this much at the beginning of my search, I plunked down $20 for this cute little stool. It's perfect for our kitchen and we've already used it quite a bit. Worth the $20 for sure.

While in Hendersonville, I also found a frame for the little print I got at the yard sale earlier in the day (white frame with the green print pictured below). You can find awesome frames for super cheap if you try. I found a little blue-grey frame for 50 cents at a yard sale to house my Kent Ambler cicada print (which I got for only $20 at Art and Light gallery off Augusta Road), an awesome orange and dark wood frame for pennies at the Goodwill pay by the pound, and a lovely green and light wood frame with a radish botanical illustration in it for $8 at an antique store in Hendersonville.

To add to this list of treasures, I got a 2 tables a couple weeks ago at the Habitat for Humanity Restore store for $24 and $25. They are solid pieces (I think the low bench table thing is made from cedar), and I know we'll get a lot of use out of them.

So here's the tally for this post:

2 bee fabric dining chairs—$120 (Glassy Mountain Fire Dept. Yard Sale)
1 Bench/Table—$25 (Habitat for Humanity Restore on Wade Hampton)
1 Side Table with Drawer—$24 (Habitat for Humanity Restore on Wade Hampton)
Longhorn Skull and Horns—$125 (Village Green Antique Mall)
Kitchen Step Stool—$20 (Village Green Antique Mall)
Radish Botanical Illustration with Frame—$8 (Antique Store)
Orange and Dark Wood Frame—$0.10 (Goodwill Pay by the Pound on Haywood Road)
Cream Frame with White Matting—$1 (Hendersonville Goodwill)
Green Plant Linocut—$1.50 (Glassy Mountain Fire Dept. Yard Sale)
Blue-Grey Frame—$0.50 (Yard Sale)
Cicada Print by Kent Ambler—$20 (Art and Light Gallery)