I'm really excited about this post. This was a project that definitely exceeded my expectations. Jake and I are wanting to start planting food as soon as possible and making our raised beds was the next step. We have SO MANY natural materials lying around our property, that we knew we could surely make something without spending a penny. Jake did some research, found inspiration for this idea and went with it.
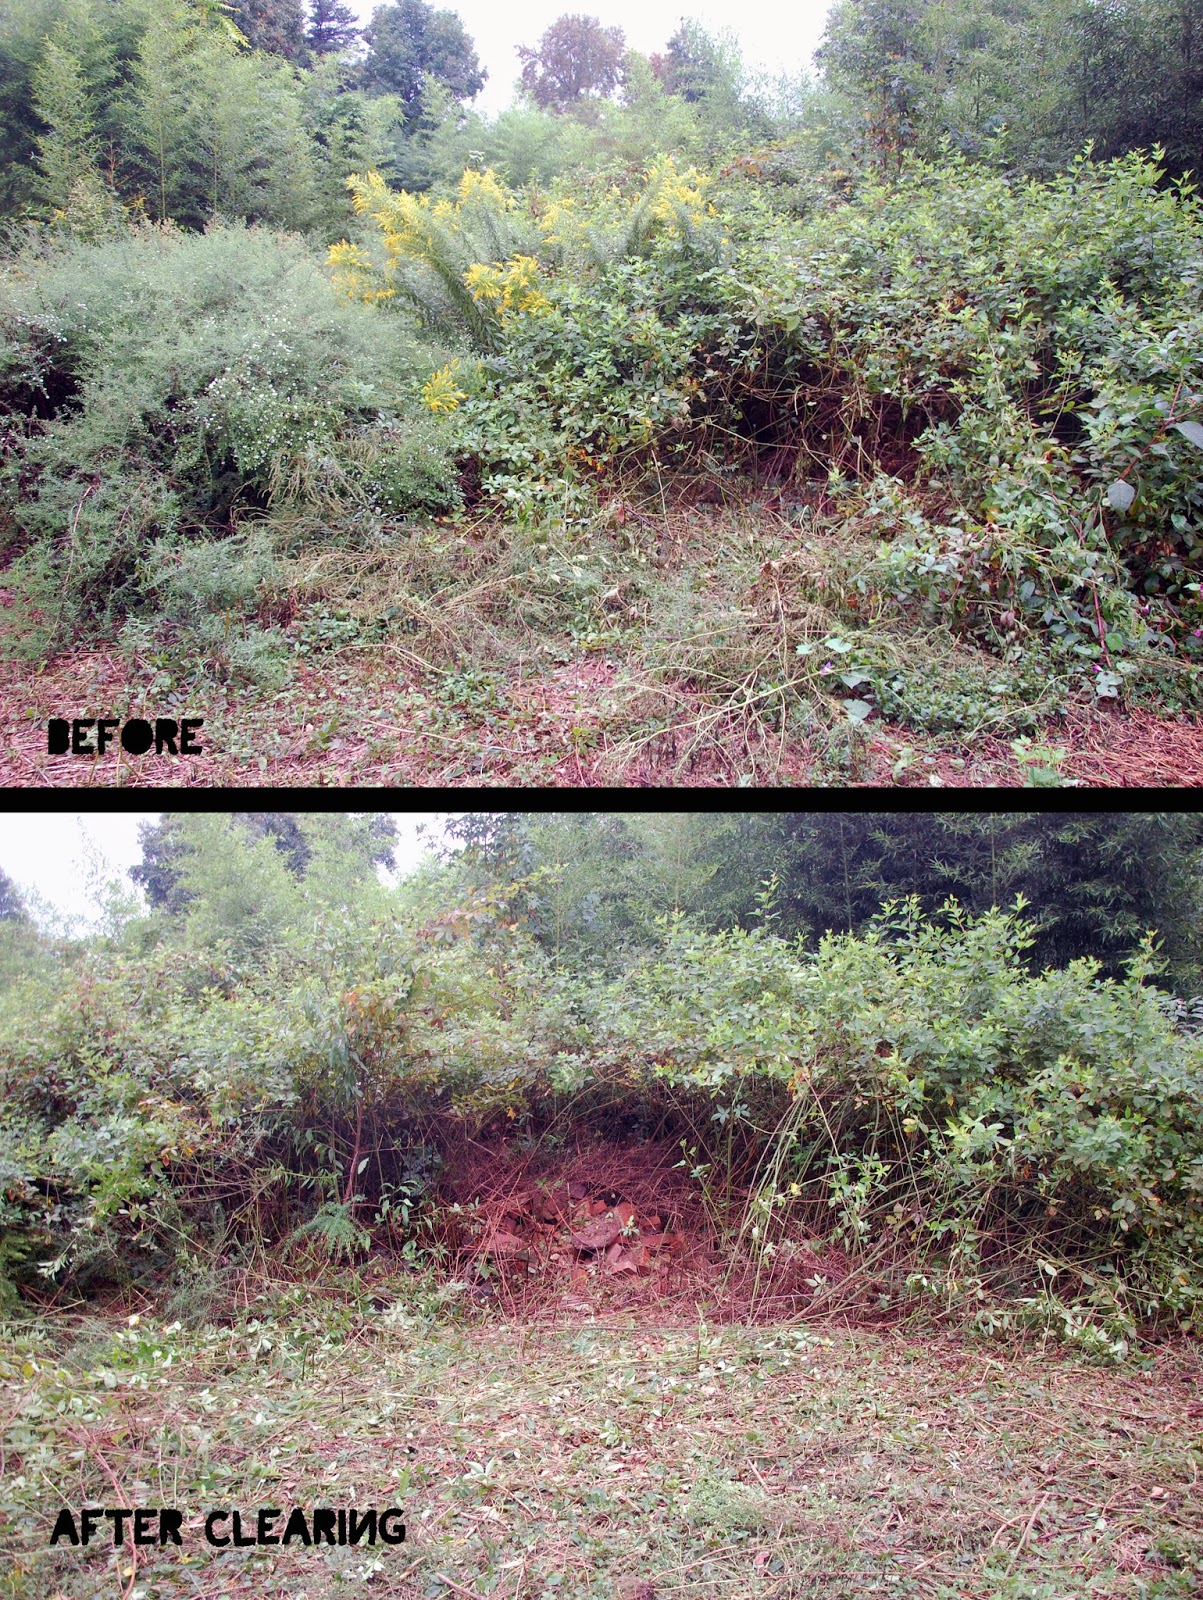
Step 1: Clear some land area
We found some stakes just chilling in our yard
Step 2: Sharpen stakes with whatever means necessary (just be careful with those machetes!)
Step 3: Trim up some bamboo (save the thin ends for future marshmallow roasting)
We did a trial wall of the raised bed to see how it would work. At first I was skeptical, but as the wall grew, so did my excitement.
Step 4: Hammer stakes into the ground at each corner of planned bed and 1 or 2 in between the corners.
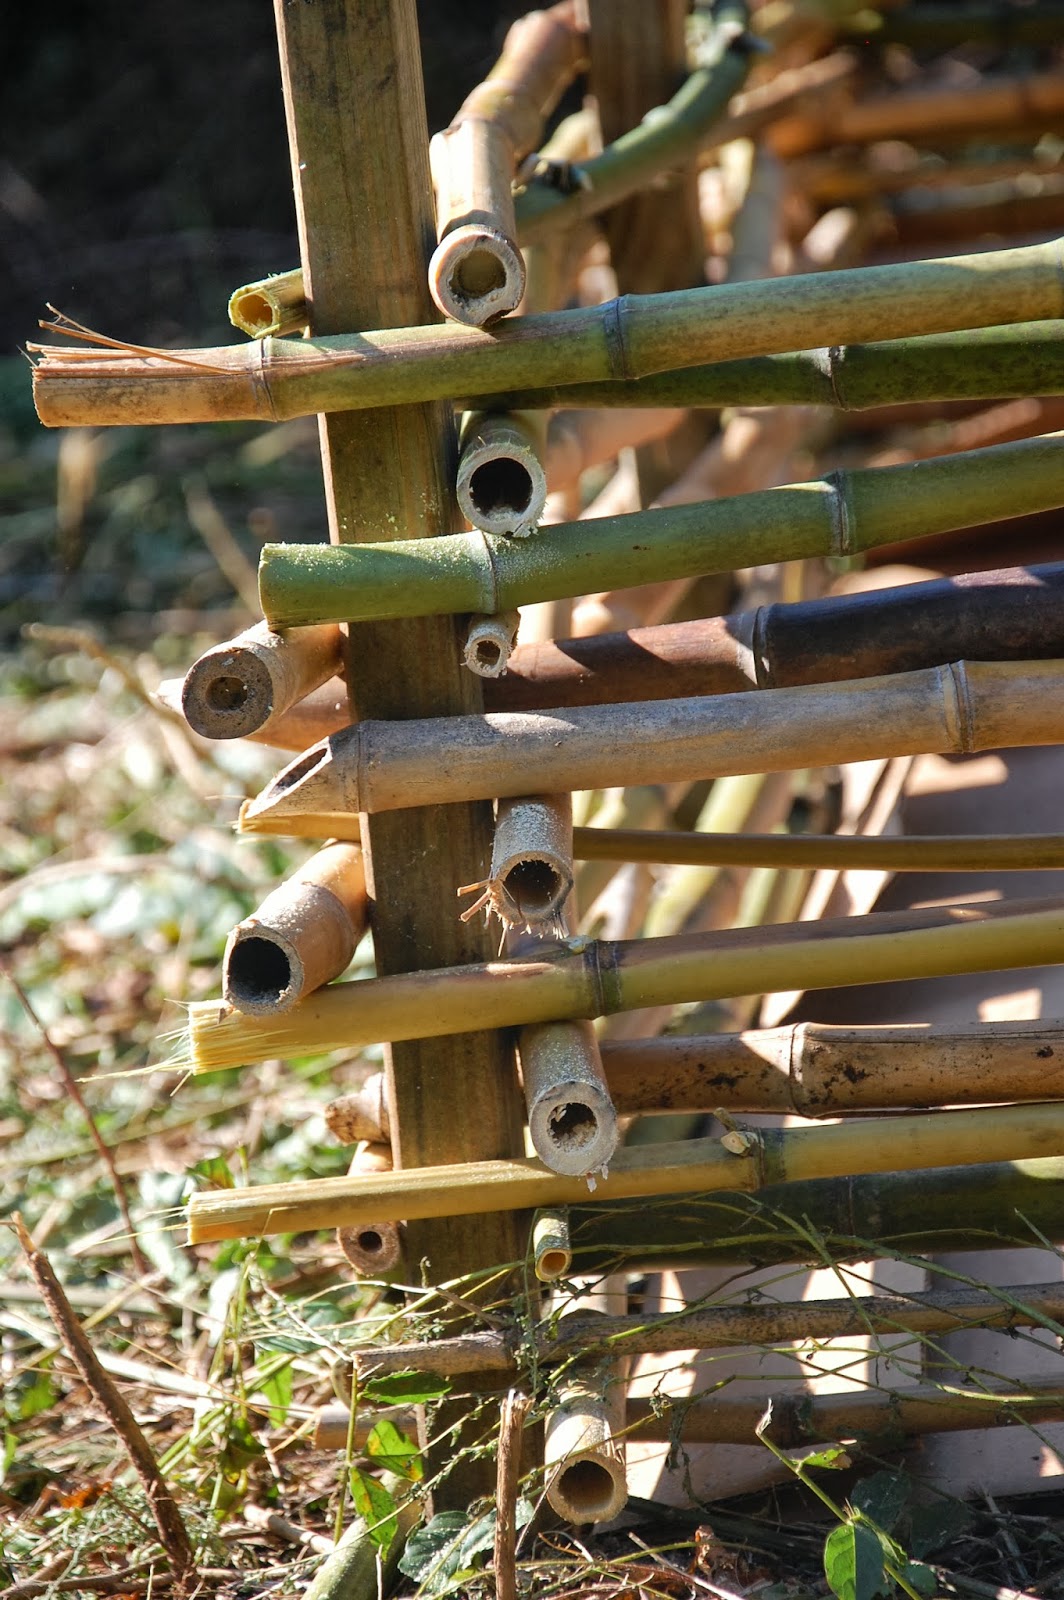
Step 5: Weave bamboo in between stakes. We chose a 5'x8' format for this raised bed. This trial wall is the 5' side.
Finished weaving!
Step 6: Trim off stakes
Finished!
The finished wall looked so great, we decided to build the full thing. But first, sharpen more stakes!
Measure for placement, then hammer into the ground
We added cardboard at the bottom for our base layer of the bed itself. Jake undid the trial wall, and started over so all the bamboo would interweave well.
Then he realized bamboo wasn't THAT bendy and switched to 4 stakes instead of 5 on the long ends of the bed.
Trim off the stakes at the very end.
Finished!!
So proud of him.